Setup SD Card for Pandaboard
fYou can read the same by clicking over here at SlideShare f
www.gunjangupta.net
All the installation work must be done on Linux. I am using Ubuntu for this purpose. Make sure SD Card is connected to computer and it is not in write protected mode. Pandaboard allows booting through SD Card but it do not allow through USB, so although all the steps will work smoothly with USB and it would look fine but Pandaboard won’t boot successfully.
First of all start terminal by Ctrl +Alt +T and write in terminal
mount

It will show us all the memory devices connected to computer. Internal Hard disk will be described as sda and other memory devices can be named sdb, sdc, etc. They are further divided in partitions and hence can have numbering appended to them like sdb1, sdb2, etc. We have to unmount all the partitions of SD Card. Here in my case I have only one partition so I will unmount it which can be done in this way:
sudo umount /dev/sdb1

We will list all the connected memory partitions of desktop by writing:
sudo fdisk -ls

Now we do not have access to SD Card through Desktop but still we can access partitions of SD card through terminal and can manipulate memory of SD Card. For manipulation we need to do memory hacking which can only be done by entering in SD Card through terminal. For 16 GB SD Card and our purpose of installing Ubuntu we have calculated number of heads as 255, sectors/track as 63 and as each sector have 512 bytes so on calculating number of cylinders = Total size / Size of one head is 1930. {Number of Cylinders= = 1930 (Approx.)}
= 1930 (Approx.)}
As my SD card is in /dev/sdb segment so I will write
sudo fdisk /dev/sdb

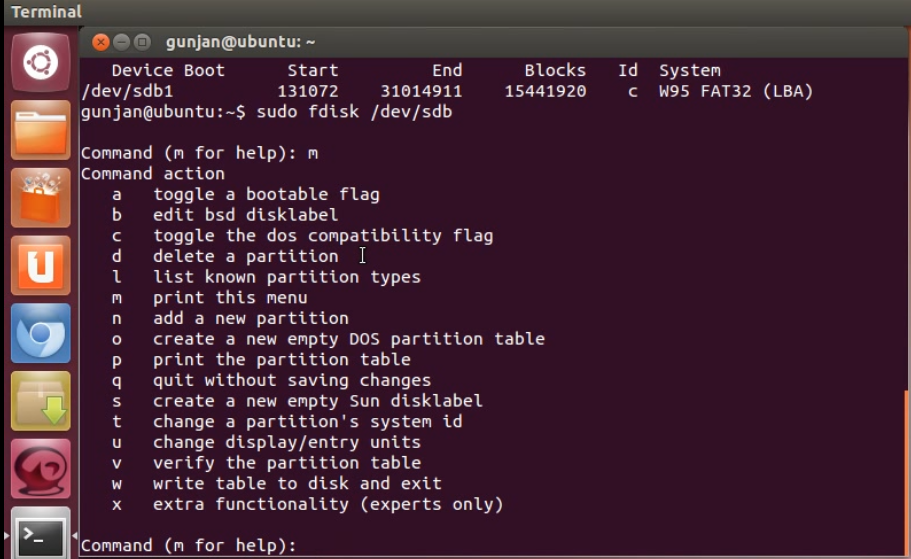
Now as shown we have different commands available to us for memory operation on SD Card. First we have to delete all the partitions. In my case I have only 1 partition so it will be deleted by “d” command. If multiple partitions are present then selecting that partition and repeating “d” again will delete it. After deleting all the partitions we use “p” to check that no partition is existing.

Now we will go in expert mode by “x” and we will have more functionalities available to us for manipulation as shown:

Now we will give no of heads by “h” = 255; no of sectors/track by “s” = 63; no of cylinders by “c” =1930 and then will return to normal mode by “r”

Now we will add a new partition by “n”. It will ask for type of partition, where we will choose primary type by “p” and will give partition number “1” and initial memory allocation size of 64 MB by “+64M” and sector size will be taken default by just entering in command.

Now we will write all the changes by “w”. It will save the altered partition table and will make sync disc and make it re-readable. Also it will take us out of SD Card command prompting to normal terminal execution.

Now we can prepare our SD Card with help of OMAP image of Ubuntu. This image can be downloaded from https://wiki.ubuntu.com/ARM/OMAP . I have Ubuntu 12.04 download in my Downloads folder, so I will enter in that particular folder
cd Downloads

Now write this script in terminal
sudo sh -c 'zcat ./ubuntu-12.04-preinstalled-desktop-armhf+omap4.img.gz |dd bs=4M of=/dev/sdb ; sync’

It will start installation of Ubuntu OS in SD Card. This process takes about 5 -10 minutes depending on your processor. After this installation ends successfully we will see number of records which were input and output, total bytes copied, time taken and speed.

Now we are ready to insert our SD Card in Pandaboard and boot it for first time. We will follow simple steps of installing Ubuntu just like the steps we follow on installing windows in our computer. After all the steps are completed, we are ready to do our work in Ubuntu on Pandaboard.
J THANK YOU J
